What Exactly is a Rubber Roof?
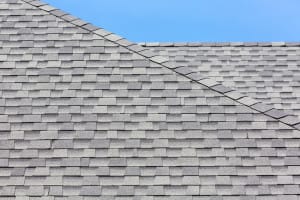
A rubber roof is basically what it sounds like, a material that is generally comprised of rubber, sawdust and slate dust. Depending on what type of roof you are covering, you can unroll a length of rubber roof sheeting on a flat top roof. You can also look into rubber shingles for the more traditional look on your pitched roof. Because of their composition, the roofing can outlast wood, slate or even asphalt shingles. Some rubber roofs have a life expectancy of fifty years.
The rubber makes it durable and able to withstand weather extremes as well as maintaining water resistance. Though they may be a little more expensive than asphalt shingles, rubber roofing is still far less expensive than slate and will not crack or crumble as that particular material will do out in the elements.
Benefits of a Rubber Roof
Durability –
A lot of rubber roofing products are made from durable recycled materials. With so much weathering and debris that are thrown at a roof, it is essential that it holds up no matter what the situation. Rubber is so durable that it will withstand most elements that it is exposed to.
Water Tightness –
The reason that rubber roofing is such a popular option for flat commercial roofs is because sometimes water will pool up when it does not have a slope to run down. When this happens, it tries to seep through the roof and into the building. With many commercial buildings with flat roofs, and even some homes, the rubber keeps the water from dripping into and ruining the structure.
Low Maintenance –
A rubber roof does not take much to keep it in good shape. Gentle cleaning is sometimes required. Because of how durable the material is, it will rarely need to be repaired. If a repair comes to light, it takes little effort to replace a rubber shingle. It can be done in just a short amount of time as well.
Appearance –
Rubber roofing looks just as sleek as any other type of roofing product. Some may envision it as a lesser product when it comes to appearance. However, often times there are customers who cannot tell the difference. There are different options for style and color, making it a great choice for both residential and commercial customers.
Installing a Rubber Roof
If you are interested in learning more about rubber as an alternative and eco-friendly material for roofing, then perhaps you could try your hand out for your next do-it-yourself project. Start with a smaller project to see how the rubber roof fares. Perhaps consider what adding additional water resistance to a small storage shed might mean. It may greatly help in keeping your items free from water damage. Apply a sheet of rubber roofing and roll the length of it.
The edge should overlap by a good few inches so make sure that you have the necessary amount. After determining the size, apply an adhesive with a roller brush. Apply on both the top and bottom, but not the very edges of it. Take a large push broom to ‘sweep’ out any air pockets before continuing with the adhesive on the very edges as well as the sheeting. This is another sealer-type glue that you apply to both the rubber roof sheeting as well as the baseboard underneath.
Again, once the glue has a tacky consistency to it, take a small roller-style paintbrush and brush out any air bubbles for that super-tight seal.
Once the glue has bonded, adhere the gutters or edging pieces and cut off the excess rubber sheet. Applying your rubber roofing can be a simple, weekend project that will help weather any future storms.